Geek review of Bluesound Node

December 30th, 2013

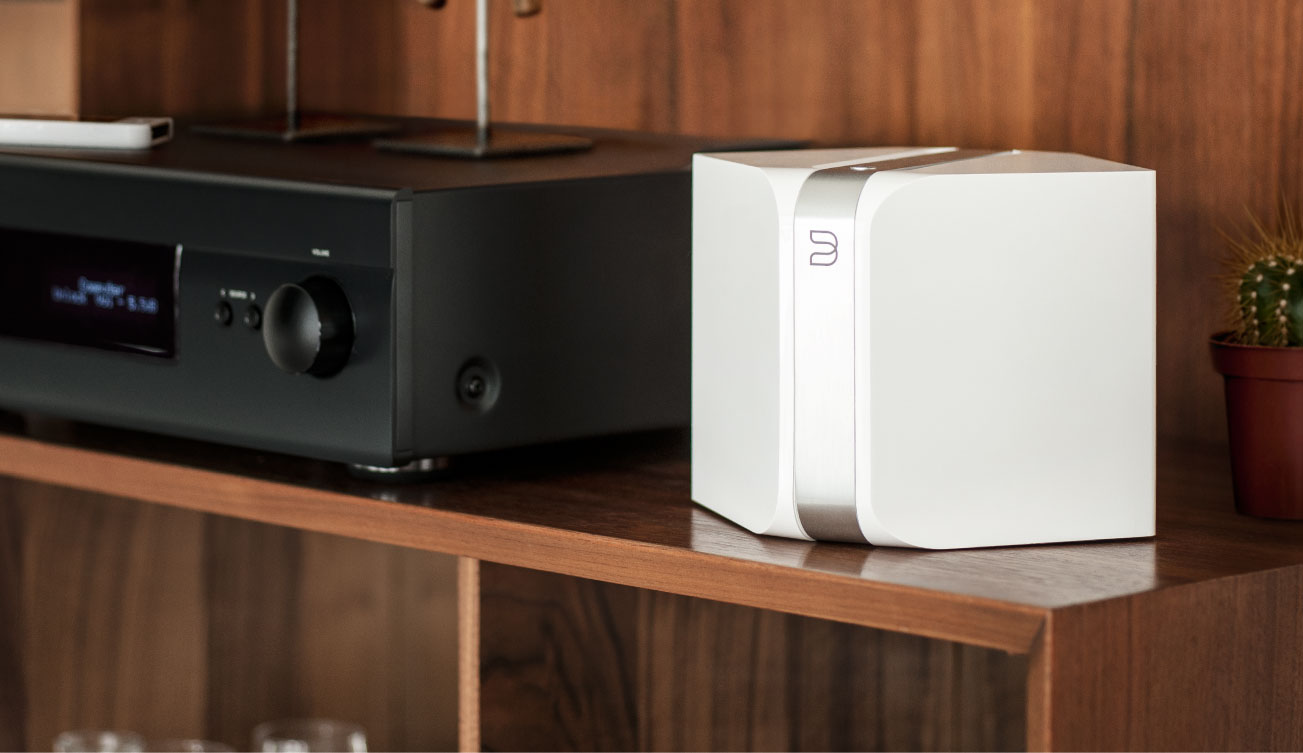
I recently reviewed the Bluesound Node from a end user perspective. It rocks the house, so to speak.

The geek in me would not and could not let that be the end of it. How is it built? What makes it tick? Stuff like that.

A quick nmap of the box yields

[code]

edison% nmap 192.168.1.119

Starting Nmap 5.00 ( http://nmap.org ) at 2013-12-30 19:37 CET
Interesting ports on 192.168.1.119:
Not shown: 998 closed ports
PORT   STATE SERVICE
22/tcp open  ssh
80/tcp open  http

Nmap done: 1 IP address (1 host up) scanned in 2.71 seconds
[/code]

The webserver serves some very minimal pages. Most interessting are the diagnostics pages. The advanced tab, actually serves the output of dmesg and /var/log/messages, so obviously linux inside.

A lot could be deduced from the output of dmesg alone, but being a geek I wanted to know everything.  A quick test with root/root and whats not yielded nothing using ssh. Actually the user/user combo works wrt. authorization, but fails due to the fact that /home/user does not exists.

On the back of the node there are a mini usb for support. Obviously that is a console port. I tried to play around with that a bit, but no obvious way in, except knowing the root password.

I then used a couple of hours of my life and figured out how to gain access without knowing the root password. The details will be kept off the net. You have to figure it out yourself.

But in the end

[code]
root@Stue ~$ uname -a
Linux Stue 2.6.35.3-998-ga1cd8a7 #117 PREEMPT Tue Dec 3 16:51:52 EST 2013 armv7l GNU/Linux
root@Stue ~$ cat /proc/cpuinfo
Processor       : ARMv7 Processor rev 5 (v7l)
BogoMIPS        : 799.53
Features        : swp half thumb fastmult vfp edsp neon vfpv3
CPU implementer : 0x41
CPU architecture: 7
CPU variant     : 0x2
CPU part        : 0xc08
CPU revision    : 5

Hardware        : NAD SOVI Board
Revision        : 51030
Serial          : 0000000000000000
root@Stue ~$ cat /proc/meminfo  | head -10
MemTotal:         254980 kB
MemFree:           83216 kB
Buffers:            7856 kB
Cached:            76932 kB
SwapCached:            0 kB
Active:            99812 kB
Inactive:          60908 kB
Active(anon):      75948 kB
Inactive(anon):      312 kB
Active(file):      23864 kB

[    0.000000] Linux version 2.6.35.3-998-ga1cd8a7 (kg@ubuntu) (gcc version 4.4.4 (4.4.4_09.06.2010) ) #117 PREEMPT Tue Dec 3 16:51:52 EST 2013
[    0.000000] CPU: ARMv7 Processor [412fc085] revision 5 (ARMv7), cr=10c53c7f
[    0.000000] CPU: VIPT nonaliasing data cache, VIPT nonaliasing instruction cache
[    0.000000] Machine: NAD SOVI Board
[    0.000000] Memory policy: ECC disabled, Data cache writeback
[    0.000000] On node 0 totalpages: 65536
[    0.000000] free_area_init_node: node 0, pgdat 804c0634, node_mem_map 804eb000
[    0.000000]   DMA zone: 192 pages used for memmap
[    0.000000]   DMA zone: 0 pages reserved
[    0.000000]   DMA zone: 24384 pages, LIFO batch:3
[    0.000000]   Normal zone: 320 pages used for memmap
[    0.000000]   Normal zone: 40640 pages, LIFO batch:7
[    0.000000] Built 1 zonelists in Zone order, mobility grouping on.  Total pages: 65024
[    0.000000] Kernel command line: console=ttymxc0,115200 root=/dev/mmcblk0p2 rootwait ro rootfstype=ext4
[    0.000000] PID hash table entries: 1024 (order: 0, 4096 bytes)
[    0.000000] Dentry cache hash table entries: 32768 (order: 5, 131072 bytes)
[    0.000000] Inode-cache hash table entries: 16384 (order: 4, 65536 bytes)
[    0.000000] Memory: 256MB = 256MB total
[    0.000000] Memory: 254868k/254868k available, 7276k reserved, 0K highmem
[    0.000000] Virtual kernel memory layout:
[    0.000000]     vector  : 0xffff0000 – 0xffff1000   (   4 kB)
[    0.000000]     fixmap  : 0xfff00000 – 0xfffe0000   ( 896 kB)
[    0.000000]     DMA     : 0xf9e00000 – 0xffe00000   (  96 MB)
[    0.000000]     vmalloc : 0x90800000 – 0xf4000000   (1592 MB)
[    0.000000]     lowmem  : 0x80000000 – 0x90000000   ( 256 MB)
[    0.000000]     modules : 0x7f000000 – 0x80000000   (  16 MB)
[    0.000000]       .init : 0x80008000 – 0x80024000   ( 112 kB)
[    0.000000]       .text : 0x80024000 – 0x8046a000   (4376 kB)
[    0.000000]       .data : 0x80484000 – 0x804c1040   ( 245 kB)
[    0.000000] SLUB: Genslabs=11, HWalign=32, Order=0-3, MinObjects=0, CPUs=1, Nodes=1
[    0.000000] Hierarchical RCU implementation.
[    0.000000]  RCU-based detection of stalled CPUs is disabled.
[    0.000000]  Verbose stalled-CPUs detection is disabled.
[    0.000000] NR_IRQS:272
[    0.000000] MXC GPIO hardware
[    0.000000] MXC IRQ initialized
[    0.000000] MXC_Early serial console at MMIO 0x73fbc000 (options ‘115200’)
[    0.000000] bootconsole [ttymxc0] enabled
[    0.000000] Console: colour dummy device 80×30
[    0.475328] Calibrating delay loop… 799.53 BogoMIPS (lpj=3997696)
[    0.703896] pid_max: default: 32768 minimum: 301
[    0.707706] Security Framework initialized
[    0.711075] Mount-cache hash table entries: 512
[    0.715116] CPU: Testing write buffer coherency: ok
[    0.722633] regulator: core version 0.5
[    0.726039] NET: Registered protocol family 16
[    0.729770] i.MX IRAM pool: 128 KB@0x90840000
[    0.733448] IRAM READY
[    0.737156] CPU is i.MX51 Revision 3.0
[    0.780569] Using SDMA I.API
[    0.783084] MXC DMA API initialized
[    0.786395] IMX usb wakeup probe
[    0.789124] the wakeup pdata is 0x80490eb8
[    0.789147] IMX usb wakeup probe
[    0.791858] the wakeup pdata is 0x80490f6c
[    0.801784] bio: create slab <bio-0> at 0
[    0.806432] SCSI subsystem initialized
[    0.810273] CSPI: mxc_spi-0 probed
[    0.813554] Freescale USB OTG Driver loaded, $Revision: 1.55 $
[    0.928925] usbcore: registered new interface driver usbfs
[    0.933645] usbcore: registered new interface driver hub
[    0.938140] usbcore: registered new device driver usb
[    0.944076] Advanced Linux Sound Architecture Driver Version 1.0.23.
[    0.949939] mc13892 Rev 2.4 FinVer 2 detected
[    0.953900] Initializing regulators for NAD SOVI.
[    0.958842] regulator: SW1: 600 <–> 1375 mV at 1050 mV
[    0.963928] regulator: SW2: 900 <–> 1850 mV at 1225 mV
[    0.968760] regulator: SW3: 1100 <–> 1850 mV at 1200 mV
[    0.973686] regulator: SW4: 1100 <–> 1850 mV at 1800 mV
[    0.978440] regulator: SWBST:
[    0.981374] regulator: VIOHI:
[    0.984427] regulator: VPLL: 1050 <–> 1800 mV at 1800 mV
[    0.989364] regulator: VDIG: 1650 mV
[    0.992759] regulator: VSD: 1800 <–> 3150 mV at 3150 mV
[    0.997744] regulator: VUSB2: 2400 <–> 2775 mV at 2600 mV
[    1.002851] regulator: VVIDEO: 2775 mV
[    1.006396] regulator: VAUDIO: 2300 <–> 3000 mV at 3000 mV
[    1.011495] regulator: VCAM: 2500 <–> 3000 mV at 2600 mV fast normal
[    1.017172] regulator: VGEN1: 1200 mV
[    1.020756] regulator: VGEN2: 1200 <–> 3150 mV at 3150 mV
[    1.025887] regulator: VGEN3: 1800 <–> 2900 mV at 1800 mV
[    1.030904] regulator: VUSB:
[    1.033666] regulator: GPO1:
[    1.036497] regulator: GPO2:
[    1.039256] regulator: GPO3:
[    1.042029] regulator: GPO4:
[    1.045666] Device spi1.0 probed
[    1.048528] Switching to clocksource mxc_timer1
[    1.053749] NET: Registered protocol family 2
[    1.057403] IP route cache hash table entries: 2048 (order: 1, 8192 bytes)
[    1.063405] TCP established hash table entries: 8192 (order: 4, 65536 bytes)
[    1.069284] TCP bind hash table entries: 8192 (order: 3, 32768 bytes)
[    1.074643] TCP: Hash tables configured (established 8192 bind 8192)
[    1.079822] TCP reno registered
[    1.082401] UDP hash table entries: 256 (order: 0, 4096 bytes)
[    1.087167] UDP-Lite hash table entries: 256 (order: 0, 4096 bytes)
[    1.092389] NET: Registered protocol family 1
[    1.096156] RPC: Registered udp transport module.
[    1.099992] RPC: Registered tcp transport module.
[    1.103922] RPC: Registered tcp NFSv4.1 backchannel transport module.
[    1.109898] LPMode driver module loaded
[    1.113096] Static Power Management for Freescale i.MX5
[    1.117591] PM driver module loaded
[    1.120606] sdram autogating driver module loaded
[    1.124745] Bus freq driver module loaded
[    1.128048] mxc_dvfs_core_probe
[    1.130828] DVFS driver module loaded
[    1.133869] i.MXC CPU frequency driver
[    1.137356] DVFS PER driver module loaded
[    1.155861] Installing knfsd (copyright (C) 1996 okir@monad.swb.de).
[    1.162207] Slow work thread pool: Starting up
[    1.166497] Slow work thread pool: Ready
[    1.169698] NTFS driver 2.1.29 [Flags: R/O].
[    1.173852] fuse init (API version 7.14)
[    1.177767] msgmni has been set to 497
[    1.183015] alg: No test for stdrng (krng)
[    1.186600] cryptodev: driver loaded.
[    1.189620] io scheduler noop registered
[    1.192902] io scheduler deadline registered
[    1.196489] io scheduler cfq registered (default)
[    1.439983] Serial: MXC Internal UART driver
[    1.443824] mxcintuart.0: ttymxc0 at MMIO 0x73fbc000 (irq = 31) is a Freescale i.MX
[    1.450099] console [ttymxc0] enabled, bootconsole disabled
[    1.462182] mxcintuart.1: ttymxc1 at MMIO 0x73fc0000 (irq = 32) is a Freescale i.MX
[    1.470812] mxcintuart.2: ttymxc2 at MMIO 0x7000c000 (irq = 33) is a Freescale i.MX
[    1.483203] loop: module loaded
[    1.486775] FEC Ethernet Driver
[    1.493082] fec_enet_mii_bus: probed
[    1.497306] ehci_hcd: USB 2.0 ‘Enhanced’ Host Controller (EHCI) Driver
[    1.504066] fsl-ehci fsl-ehci.0: Freescale On-Chip EHCI Host Controller
[    1.510711] fsl-ehci fsl-ehci.0: new USB bus registered, assigned bus number 1
[    1.542280] fsl-ehci fsl-ehci.0: irq 18, io base 0x73f80000
[    1.562251] fsl-ehci fsl-ehci.0: USB 2.0 started, EHCI 1.00
[    1.568937] hub 1-0:1.0: USB hub found
[    1.572760] hub 1-0:1.0: 1 port detected
[    1.792258] fsl-ehci fsl-ehci.1: Freescale On-Chip EHCI Host Controller
[    1.798907] fsl-ehci fsl-ehci.1: new USB bus registered, assigned bus number 2
[    1.832279] fsl-ehci fsl-ehci.1: irq 14, io base 0x73f80200
[    1.852257] fsl-ehci fsl-ehci.1: USB 2.0 started, EHCI 1.00
[    1.858786] hub 2-0:1.0: USB hub found
[    1.862596] hub 2-0:1.0: 1 port detected
[    1.867015] Initializing USB Mass Storage driver…
[    1.872131] usbcore: registered new interface driver usb-storage
[    1.878187] USB Mass Storage support registered.
[    1.882826] ARC USBOTG Device Controller driver (1 August 2005)
[    1.889550] input: gpio-keys as /devices/platform/gpio-keys/input/input0
[    1.897518] pmic rtc probe start
[    1.901432] pmic_rtc mc13892_rtc.1: rtc core: registered mc13892_rtc as rtc0
[    1.908562] pmic rtc probe succeed
[    1.912319] IR NEC protocol handler initialized
[    1.916856] IR RC5(x) protocol handler initialized
[    1.921650] IR RC6 protocol handler initialized
[    1.926214] IR JVC protocol handler initialized
[    1.930748] IR Sony protocol handler initialized
[    1.935382] MXC WatchDog Driver 2.0
[    1.939394] MXC Watchdog # 0 Timer: initial timeout 60 sec
[    1.946510] mxsdhci: MXC Secure Digital Host Controller Interface driver
[    1.953319] mxsdhci: MXC SDHCI Controller Driver.
[    1.958952] mmc0: SDHCI detect irq 128 irq 1 INTERNAL DMA
[    1.964444] mxsdhci: MXC SDHCI Controller Driver.
[    1.969706] mmc1: SDHCI detect irq 0 irq 2 INTERNAL DMA
[    1.975389] Registered led device: status_blue_a
[    1.975565] Registered led device: status_blue_b
[    1.975737] Registered led device: status_green
[    1.975909] Registered led device: status_red
[    1.977248] Cirrus Logic CS4350 ALSA SoC DAC Driver
[    2.013004] cs4350_spi spi1.2: found a CS4350 at REV C2
[    2.028561] No device for DAI imx-ssi-1-0
[    2.032611] No device for DAI imx-ssi-1-1
[    2.036660] No device for DAI imx-ssi-2-0
[    2.040675] No device for DAI imx-ssi-2-1
[    2.044735] No device for DAI imx-ssi-3-0
[    2.048751] No device for DAI imx-ssi-3-1
[    2.053946] in imx_sovi_asoc_init
[    2.057321] in imx_sovi_cs4350_probe
[    2.072494] capture=0 ext_ram=0 UseIram=0
[    2.077896] DMA Sound Buffers Allocated:UseIram=0 buf->addr=9f300000 buf->area=f9e0a000 size=524288
[    2.086991] asoc: cs4350 <-> imx-ssi-2-0 mapping ok
[    2.091916] Failed to add route AOUT1L->Line Out Jack
[    2.101133] ALSA device list:
[    2.104163]   #0: imx-sovi (CS4350)
[    2.108207] TCP cubic registered
[    2.111463] NET: Registered protocol family 17
[    2.116030] VFP support v0.3: implementor 41 architecture 3 part 30 variant c rev 2
[    2.157905] regulator_init_complete: disabling VCAM
[    2.163022] regulator_init_complete: disabling VAUDIO
[    2.169251] regulator_init_complete: disabling VSD
[    2.174254] regulator_init_complete: disabling VDIG
[    2.179556] pmic_rtc mc13892_rtc.1: setting system clock to 2013-12-30 18:50:38 UTC (1388429438)
[    2.188605] Waiting for root device /dev/mmcblk0p2…
[    2.291639] mmc0: new high speed SDHC card at address aaaa
[    2.297558] mmcblk0: mmc0:aaaa SU04G 3.69 GiB
[    2.302174]  mmcblk0: p1 p2 p3
[    2.427492] mmc1: new SDIO card at address 0001
[    2.437448] EXT4-fs (mmcblk0p2): mounted filesystem with ordered data mode. Opts: (null)
[    2.445667] VFS: Mounted root (ext4 filesystem) readonly on device 179:2.
[    2.452531] Freeing init memory: 112K
[    2.572303] USB Host suspend begins
[    2.572327] will suspend roothub and its children
[    2.572361] ehci_fsl_bus_suspend, DR
[    2.572777] host suspend ends
[    2.868618] EXT4-fs (mmcblk0p3): warning: maximal mount count reached, running e2fsck is recommended
[    2.880309] EXT4-fs (mmcblk0p3): recovery complete
[    2.886462] EXT4-fs (mmcblk0p3): mounted filesystem with ordered data mode. Opts: commit=30
[    4.542400] ehci_fsl_bus_suspend, Host 1
[    6.560837] mxc_spdif mxc_spdif.0: MXC SPDIF Audio Transmitter
[    6.569232] No device for codec mxc spdif
[    6.573331] No device for DAI mxc spdif
[    6.584224] No device for DAI imx-spdif-dai
[    6.600331] capture=0 ext_ram=0 UseIram=0
[    6.617000] DMA Sound Buffers Allocated:UseIram=0 buf->addr=9f500000 buf->area=f9e8f000 size=524288
[    6.626175] asoc: mxc spdif <-> imx-spdif-dai mapping ok
[    6.770533] eth0: Freescale FEC PHY driver [Generic PHY] (mii_bus:phy_addr=0:00, irq=-1)
[    6.961939] Compat-drivers backport release: compat-drivers-v3.8-1
[/code]

So it is a NAD SOVI board using an i.mx51 freescale arm processor. With 256MB memory. The sound are produced by an Cirrus Logic CS4350 chip. The system runs a 2.6.35 kernel off a NAND flash chip in a very trimmed down setup based around busybox and the selected custom applications needed to make a media player. The system utilizes the very well known and awsome u-boot boot loader.

Without voiding guarantee by opening up the box, I can not get more specific information than that.

What amazes me the most about this setup, is that the system outputs very good sound quality, is very very stable, has fast boot times and yet does not consume very much memory. This is a lean, mean, music machine. It has one purpose in life and are trimmed down to fulfill that purpose and only that purpose.

That being said, I can see that the platform is built to support more extensive media streamers. Mine is just the low cost one. I also speculate that the NAD SOVI board has GPIO pins needed to fit into products with way more features.

Gaining access to the OS will allow me to tweak the setup a bit more to my need being both a programmer and a Linux sysadm. I have no desire to alter the OS and/or hardware, but I can envision the need for using the USB port to control an amplifier or integrate the NODE with other equipment over IP. Small tweaks. But again. Out of the box this is a wonderful product that I will recommend to friends and family.


End user review of Bluesound Node

December 17th, 2013

My wife and I have for years listened to music from CDs on our DALI 400 loudspeakers through an NAD 3020i amplifier and our NAD T514 DVD player.

This setup has served us well. CD’s are however an outdated technology and we found

  • that we stashed most of our CDs away. They might have looked cool on the wall in the 90′, but in 2013, in Denmark, they should be out of sight
  • that due to the point above, we only listened to a selected few
  • that many of our CDs was started to wear out
  • that our T514, which have served us well, was started to show the first sign of old age

So what to do? We looked for a way to be able to enjoy CD quality without hazzle, while taking the leap into streaming music.

We took a look at Sonos, but rejected it due to their sound quality. We considered an all streaming solution (skipping our CDs for good), but also rejected that, due to posession of a lot of non-mainstream CDs.

After investigating the market in 2013, we decided to try out a product from a canadian firm called bluesound. Bluesound and NAD electronics are owned by the same holding company, Lenbrook Industries, so many of the engineers producing NAD equipment are also involved in producing Bluesound equipment. That bodes well for the quality of Bluesound. And then bluesound have recieved good reviews audiowise from a couple of sites around the world. Given that the equipment is fairly fresh of the assembly line that is also a plus.

Bluesound produces a couple of variants of their streaming media players. We already have an amplifier, so we passed on the powernode. The vault seems cool, but a bit pricy. So due to the fact that I, as a nerd, already have a server running 24×7, we choose the cheap(ish) Bluesound Node.

Bluesound Node

We bought the node through the danish reseller hifiklubben.dk. It arrived in a couple of days. The package contains the node itself, a quickstart manual, and cables needed for connecting the node to power, network and amplifier.

The node does not have a remote, but relies on the user having a smartphone (android or ios), which will be used for controlling the node through the Bluesound App.

The initial setup was a breeze. When first powered on, it comes up in AP/hotspot mode. You connect your smartphone to the AP, and start the Bluesound App. A wizard will guide you through the setup, which takes 1-3 minutes. After that, the node reboots and is ready for use. I setup a CIFS share.

I then ripped all our CDs using fre:ac. It went fairly quickly. A couple of notes:

  • The more CD drives, the more you can process at a time
  • Use CDDB
  • Rip to FLAC, it will save cpu cycles and you basically rip as fast as the CD drive will allow you to. Some of our CDs took around 60 seconds to rip to FLAC!
  • Each time you rip a CD, browse for the cover art meanwhile and store the coverart inside the folder with the music and name the cover art folder.jpg

After 5-10 cds it was apparent to us, that the Bluesound Node produces sound of the same or better quality than our CD player. So bluesound node is without a good streaming player. Factoring in how little money you have to pay for it, it is a really good bargin. It has just worked since day one and we have been listening to a lot more music than we did just 14 days ago!

The app on the smartphone works well. It has some minor issues, but the real beef with the app is the fact that we lack some features. Those will hopefully be added later.

So all in all 9 out of 10 stars from an enduser of bluesound node. It is highly recommended for replacement of CDs.

Upgrade of dd-wrt from build 14929 to build 21061 on an E3000

April 26th, 2013

A day off. What to do? Upgrade something ofcourse. This time it was my trustworthy E3000 router that I have had for one and a half year.

Things have been progressing in the dd-wrt camp, and they have switched from the e2k-e3k format to the new nv60 build format.

Essentially flashing the E3000 with a custom build goes something like this:

  • Flash a trailed build built especially for your device. Do not flash with a build, that does not have your device name it it!
  • Flash the system with an nv60 build

Then there are some cutover points. Roughly speaking build 18000 marks the beginning of the nv60 builds. So you can not flash a post 18000 nv60 build on a router running a pre 18000 e2k-e3k build, which was what I had. So first a trailed mini-build

dd-wrt.v24-21061_NEWD-2_K2.6_mini-e3000.bin

to let me come to 21061. And then an nv60 version of the same build (though with more features)

dd-wrt.v24-21061_NEWD-2_K2.6_std_usb_nas-nv60k.bin

Time used on figuring this out: 30 minutes.
Time used on flashing: 3 minutes.

Restoring a wordpress site by scraping/crawling google

January 13th, 2013

I love challenges, but once in a while the tend to be way tooo big! During my christmasholidays I accidently wiped my home server. I wanted to do some LVM stuff online, remotely, without console access, through the ESXi console. … and really thought that nothing could go wrong ;-). First assumption being wrong.

To make a long history short. I shot myself in the foot and was without a server for a 3-4 days. When I got home again, I thought a simple reboot and some LVM magic would make everything all right. Second assumption being wrong.

So in the very end I had to reinstall my server from scratch. Luckily I backup my stuff using and so should you! It will save your butt some time!

It turned out that, for some bizaro reason, my database had not been dumped to csv files. So in the end I came to these conclusions:

  • I lost my database.
  • I thus lost my wordpress blog.

🙁

But loving challenges I refused to let that be the end. I thought about using archive.org, but they did not really have a new crawl of my site.

I decided to crawl google! Not as easy as it might sound for a couple of reasons:

  • Google does not like being crawled …. at all. If googles infinite number of computers discover that you are crawling them, then your IP will be blocked from seeing their cached content.
  • When you enter keywords into google you normally get thousans of links to follow. I needed one. The correct one! The one that was a cached version of my site.

So I fired up my editor and utilized the great WWW::Mechanize. I ended up with this script, which do all the hard work of scraping google. It will take some time to complete — hours and days even! It will get there though. If you try to speed things up it will take longer as you will be blocked by google when they detect you are scraping them. Be warned. Been there. Tried that. Got blocked.

Having retrieved all of my old site through google I had to parse these pages and import them into wordpress. So again I fired up my editor and wrote this little script. For this to work, you have to have

    • a clean wordpress installation with a hello world post
    • XMLRPC writing enabled in WordPress, as the script uses WordPress::XMLRPC.
    • the following in wp-config.php
      [code]
      define( ‘AUTOSAVE_INTERVAL’,    3600 );     // autosave 1x per hour
      define( ‘WP_POST_REVISIONS’,    false );    // no revisions
      define( ‘DISABLE_WP_CRON’,      true );
      define( ‘EMPTY_TRASH_DAYS’,     7 );        // one week
      [/code]

So in the end what did I loose and what did I learn? I lost my comments on my site. Or more preciesely: I have them,but I will postpone putting them back in until I get the time to fool around with coding again. And I learnt a lot about tripplechecking my backup for all their pieces before doing storage related work remotely without a proper console!

LUNZ and HP-UX 11.31

November 28th, 2012

LUNZ is a placeholder. It is as simple as that. In HP-UX 11.31, ioscan runs without human intervention. Thus you can end up in a situation where your server can see the storage cabinet, but no luns are presented to the server … yet. And thus you get LUNZ. The same applies for 11.23 and below, but it is unlikely that you scan for devices before your storage admin comes along.

So back on track. You then end up with

disk 3 0/0/0/5/0/0/0.101.140.255.0.0.0 sdisk NO_HW DEVICE DGC LUNZ
/dev/dsk/c26t0d0 /dev/rdsk/c26t0d0
disk 4 0/0/0/5/0/0/0.101.156.255.0.0.0 sdisk NO_HW DEVICE DGC LUNZ
/dev/dsk/c27t0d0 /dev/rdsk/c27t0d0

And no matter how many times you do ioscan -fn, you get no devices. Before you go yelling at your storage admin, then try this

sudo ioscan -fnkC disk | grep LUNZ
disk 3 0/0/0/5/0/0/0.101.140.255.0.0.0 sdisk NO_HW DEVICE DGC LUNZ
disk 4 0/0/0/5/0/0/0.101.156.255.0.0.0 sdisk NO_HW DEVICE DGC LUNZ
disk 7 0/0/0/5/0/0/1.201.140.255.0.0.0 sdisk NO_HW DEVICE DGC LUNZ

sudo rmsf -H 0/0/0/5/0/0/0.101.140.255.0.0.0
sudo rmsf -H 0/0/0/5/0/0/0.101.156.255.0.0.0
sudo rmsf -H 0/0/0/5/0/0/1.201.140.255.0.0.0
sudo rmsf -H 0/0/0/5/0/0/1.201.156.255.0.0.0

Check

sudo ioscan -fnkC disk | grep LUNZ | wc -l
0

Try to get them onboard

sudo ioscan -fn
sudo insf
sudo ioscan -fnkC disk

Check

sudo ioscan -fnkC disk | grep DGC | wc
0 0 0

Still not there?! Odd? Not really. On HP-UX 11.31, you also have the new agile device. This is blocking the access.

sudo ioscan -fnNkC disk |grep LUNZ
disk 5 64000/0xfa00/0×5 esdisk NO_HW DEVICE DGC LUNZ

Run

sudo rmsf -H 64000/0xfa00/0×5

Now run

sudo ioscan -fnC disk
sudo insf

Check. Lo and behold. They are there now.

sudo ioscan -fnkC disk | grep DGC | wc
24 204 2244

Installing OS-X on ESXi 5.0.0, 469512 running on an AMD Fusion APU

August 13th, 2012

I wanted to run OS-X at home, preferrably on my AMD Fusion based ESXi 5.0.0, 469512 host. If you search the net for that combination you will find a lot of posts about people having issues and not many about people having a great success. Digging into this it turned out to be relatively simple to do.

  1. Obtain OS-X Snow leopard ISO image
  2. Obtain Donks OS-X unlocker for vmware. I used unlock-all-v110.zip
  3. Backup you ESXi host and VMs before doing anything! I am not liable in any way for any issues you encounter! It worked for me. Your millage may vary and that is actually your problem ;-)
  4. Patch ESXi with Donks unlocker by unzipping the zip file on the ESXi host and running esxi/install.sh. Make sure to read the readme file beforehand and make sure that all the prereqs are in place before you start!
  5. Reboot your ESXi host and hope for the best.
  6. After a successful reboot of ESXi with Donks patches, create a new OS-X based VM. 64-bit, 4GB memory, 1 processor (and one processor only, otherwise you will get panics during installation), LSI Logic Parallel SCSI, E1000 network
  7. Do NOT power up the VM.
  8. Enter the ESXi cli.
  9. Browse to the location of the VM on the ESXi datastore
  10. type vi *.vmx <enter>
  11. remove all references to CPUID
  12. insert the following CPUID information (this will make ESXi present the VM as a core2duo based machine to the guest allowing OS-X to boot on the hardware)
    hostCPUID.0 = "0000000668747541444d416369746e65"
    hostCPUID.1 = "00500f100002080000802209178bfbff"
    hostCPUID.80000001 = "00500f1000001242000035ff2fd3fbff"
    guestCPUID.0 = "00000006756e65476c65746e49656e69"
    guestCPUID.1 = "000006f10000080080802209078bfbff"
    guestCPUID.80000001 = "00500f1000001242000003e92bd3fbff"
    userCPUID.0 = "0000000668747541444d416369746e65"
    userCPUID.1 = "00500f100002080080802209078bfbff"
    userCPUID.80000001 = "00500f1000001242000003e92bd3fbff"
    cpuid.0.ebx="0111:0101:0110:1110:0110:0101:0100:0111"
    cpuid.0.edx="0100:1001:0110:0101:0110:1110:0110:1001"
    cpuid.0.ecx="0110:1100:0110:0101:0111:0100:0110:1110"
    cpuid.1.eax="0000:0000:0000:0000:0000:0110:1111:0001"
  13. Save the vmx file
  14. Attach the Snow Leopard ISO to the VM and boot it.
  15. Perform a normal OS-X installation.

Nothing much actually. The final solution

And seen from vnc


Quite simple …. as promised :-)

Renault Megane III hatchback

August 8th, 2012

For the summer vacation I rented anin(formerly københavns delebiler). It is a 6 speed manual transmission car. It is nothing out of the ordinary. It has the features that you would expect from a car of this type, but nothing more. The 1.5 Diesel Engine is sufficient for the danish speedlimits, which is just another way of saying that it is actually quite boring to drive. I’ll give it 3 out of 5 stars.

Renault Megane III

Music by Mikael Fyrek

August 2nd, 2012

As of late I have been listening quite a lot to Mikael Fyreks music. Reminds me a lot of the time when I was a kid doing demoscene productions. He is a musical master in the same class as all my musical heroes from back then. Do yourself a favor and listen to a true musical master; you will not regret it!

Version 2 of small perl mechanize script to send sms from danish telco provider Bibob

July 26th, 2012

A year ago I wrote a small perl Mechanize script to send sms from the command line (very useful for scripts) utilizing the web-sms service you get as a Bibob customer.

Now a year later I actually found some use for it, but it didn’t work anymore due to the fact that Bibob had changed their website since then. And not just the graphics and layout, but the whole shebang.

I have made some very small changes to the perl script to make it work again and I appriciate the versatility of perl and that the Bibob webmasters obviously thought a great deal about the upgrade.

The new code can be downloaded here, hbut is also included verbatim in this post

#!/usr/bin/perl -w

##############################################################################
#
# File:         bibob_sms.pl
# Type:         bot
# Description:  Send an SMS using bibob websms and perl mechanize
# Language:     Perl
# Version:      2.0
# License:      BeerWare – Thomas S. Iversen wrote this file. As long as you
#               retain this notice you can do whatever you want with this
#               stuff. If we meet some day, and you think this stuff is worth
#               it, you can buy me a beer in return. Thomas
# History:
#               2.0 – 2011.07.26 – New version due to total bibob.dk relayout
#               1.0 – 2011.07.28 – Intial version
#
# (C) 2011,2012 Thomas S. Iversen (zensonic@zensonic.dk)
#
##############################################################################

use strict;
use WWW::Mechanize;
use File::Basename;

# Variables controlling bot behaviour

my $sms_url=‘https://www.bibob.dk/min-konto/web-sms’;
my $login_url=‘https://www.bibob.dk/’;

my $script=basename($0);
die "$script <bibob mobile number> <bibob password> <recipeient number> <message>" if(!($#ARGV+1 == 4));

my $username=$ARGV[0];
my $password=$ARGV[1];
my $recipients=$ARGV[2];
my $message=$ARGV[3];

#
# You should not need to alter anything below this line
#

#
# Main code.
#

# Create mechanize instance
my $mech = WWW::Mechanize->new( autocheck => 1 ); #Create new browser object
$mech->agent_alias( ‘Windows IE 6′ ); #Create fake headers just in case
$mech->add_header( ‘Accept’ => ‘text/xml,application/xml,application/xhtml\+xml,text/html,text/plain,image/png’ );
$mech->add_header( ‘Accept-Language’ => ‘en-us,en’ );
$mech->add_header( ‘Accept-Charset’ => ‘ISO-8859-1,utf-8′ );
$mech->add_header( ‘Accept-Language’ => ‘en-us,en’ );
$mech->add_header( ‘Keep-Alive’ => ’300′ );
$mech->add_header( ‘Connection’ => ‘keep-alive’ );

# Get login page
$mech->get($login_url);
$mech->success or die "Can’t get the login page";

# Submit the login form with username (mobilnumber) and password
$mech->submit_form(with_fields => { ‘phoneNumber’ => $username, ‘password’ => $password });
$mech->success or die "Could not login";

# Get sms page
$mech->get($sms_url);
$mech->success or die "Could not get sms page";

# Send sms by submitting sms form
$mech->submit_form(with_fields => { ‘recipients’ => $recipients, ‘message’ => $message });
$mech->success or die "Could not send sms";

# Figure out status
my $html = $mech->content();
die "Form submitted, but message does not appear to be sent" if(!$html=~/Beskeden blev afsendt/ig);
exit 0;

Setting up an TP-Link TD-8616 ADSL modem with TDC

July 8th, 2012

I got tired of my zyxel P660R-D1 due to it rebooting once in while. I went looking for an replacement ADSL to ethernet box. The Zyxel is a full blown router, but why use that when I already have an Linksys E3000? Looking around I found the P-Link TD-8616 ADSL modem, which sells for around $25.

To set it up was very very very easy:

  • Plug it in.
  • Configure my laptop with at static ip of 192.168.1.2.
  • Connecting the laptop and the TD-8616 back to back.
  • Browsing to 192.168.1.1
  • Altering the VCI/VPI to 0/101 to match TDC
  • Browsing the web interface of my E3000
  • Using the mac address clone feature, giving the E3000 the mac of the old zyxel router
  • Renew the lease of the E3000.
  • All done.

I’ll reserve my final judgement until I have seen the stability, but the setup was easy enough and until know it performs quite nicely with 40% of the power that the zyxel needed.