Archive for the ‘linux-lvm’ Category

Restoring a wordpress site by scraping/crawling google

Sunday, January 13th, 2013

I love challenges, but once in a while the tend to be way tooo big! During my christmasholidays I accidently wiped my home server. I wanted to do some LVM stuff online, remotely, without console access, through the ESXi console. … and really thought that nothing could go wrong ;-). First assumption being wrong.

To make a long history short. I shot myself in the foot and was without a server for a 3-4 days. When I got home again, I thought a simple reboot and some LVM magic would make everything all right. Second assumption being wrong.

So in the very end I had to reinstall my server from scratch. Luckily I backup my stuff using and so should you! It will save your butt some time!

It turned out that, for some bizaro reason, my database had not been dumped to csv files. So in the end I came to these conclusions:

  • I lost my database.
  • I thus lost my wordpress blog.

🙁

But loving challenges I refused to let that be the end. I thought about using archive.org, but they did not really have a new crawl of my site.

I decided to crawl google! Not as easy as it might sound for a couple of reasons:

  • Google does not like being crawled …. at all. If googles infinite number of computers discover that you are crawling them, then your IP will be blocked from seeing their cached content.
  • When you enter keywords into google you normally get thousans of links to follow. I needed one. The correct one! The one that was a cached version of my site.

So I fired up my editor and utilized the great WWW::Mechanize. I ended up with this script, which do all the hard work of scraping google. It will take some time to complete — hours and days even! It will get there though. If you try to speed things up it will take longer as you will be blocked by google when they detect you are scraping them. Be warned. Been there. Tried that. Got blocked.

Having retrieved all of my old site through google I had to parse these pages and import them into wordpress. So again I fired up my editor and wrote this little script. For this to work, you have to have

    • a clean wordpress installation with a hello world post
    • XMLRPC writing enabled in WordPress, as the script uses WordPress::XMLRPC.
    • the following in wp-config.php
      [code]
      define( ‘AUTOSAVE_INTERVAL’,    3600 );     // autosave 1x per hour
      define( ‘WP_POST_REVISIONS’,    false );    // no revisions
      define( ‘DISABLE_WP_CRON’,      true );
      define( ‘EMPTY_TRASH_DAYS’,     7 );        // one week
      [/code]

So in the end what did I loose and what did I learn? I lost my comments on my site. Or more preciesely: I have them,but I will postpone putting them back in until I get the time to fool around with coding again. And I learnt a lot about tripplechecking my backup for all their pieces before doing storage related work remotely without a proper console!

Changing boot order in BIOS on IBM xSeries servers without RSAII (using ASU)

Wednesday, April 25th, 2012

Today I faced challenge where I had to reinstall some IBM xSeries servers in a datacenter far far away using PXE boot. These servers did not have an RSA/RSAII card, but that is really not a problem using PXE. I prepared the kickstart on the first of the servers and did some reinstalls to get it right. And then I issued an ipmi command to reboot the rest of the servers. … and then nothing happened. Well the rest of the servers rebooted back into the old OS instance. It was ofcourse an issue with the boot order in the BIOS on the servers.

Now what? Either drive to the DC or call someone there to get it fixed. …. or use the IBM ASU tool to change the BIOS settings from within an OS instance. It is quite a useful tool

Without further ado

[root@biomd1 ~]# /opt/ibm/toolscenter/asu/asu show | grep Boot
CMOS_AlternateBootDevice4=Hard Disk 0
CMOS_AlternateBootDevice3=CD ROM
CMOS_AlternateBootDevice2=Diskette Drive 0
CMOS_AlternateBootDevice1=Network
CMOS_PrimaryBootDevice4=Network
CMOS_PrimaryBootDevice3=Hard Disk 0
CMOS_PrimaryBootDevice2=Diskette Drive 0
CMOS_PrimaryBootDevice1=CD ROM
CMOS_PostBootFailRequired=Enabled
CMOS_PCIBootPriority=Planar SAS
CMOS_RemoteConsoleBootEnable=Disabled

[root@biomd1 ~]# /opt/ibm/toolscenter/asu/asu set CMOS_PrimaryBootDevice4 “Hard Disk 0″
IBM Advanced Settings Utility version 3.60.69K
Licensed Materials – Property of IBM
(C) Copyright IBM Corp. 2007-2010 All Rights Reserved
CMOS_PrimaryBootDevice4=Hard Disk 0
[root@biomd1 ~]# /opt/ibm/toolscenter/asu/asu set CMOS_PrimaryBootDevice3 “Network”
IBM Advanced Settings Utility version 3.60.69K
Licensed Materials – Property of IBM
(C) Copyright IBM Corp. 2007-2010 All Rights Reserved
CMOS_PrimaryBootDevice3=Network

[root@biomd1 ~]# /opt/ibm/toolscenter/asu/asu show | grep Boot
CMOS_AlternateBootDevice4=Hard Disk 0
CMOS_AlternateBootDevice3=CD ROM
CMOS_AlternateBootDevice2=Diskette Drive 0
CMOS_AlternateBootDevice1=Network
CMOS_PrimaryBootDevice4=Hard Disk 0
CMOS_PrimaryBootDevice3=Network
CMOS_PrimaryBootDevice2=Diskette Drive 0
CMOS_PrimaryBootDevice1=CD ROM
CMOS_PostBootFailRequired=Enabled
CMOS_PCIBootPriority=Planar SAS
CMOS_RemoteConsoleBootEnable=Disabled

Nifty, right?


From x61s to x60s

Sunday, January 22nd, 2012

Well. Once more I picked up some old equipment at work. This time an x60s. I have recently gotten my hand on a x61s. The x61s is a wonderful machine by most standards, especially as I bought a large 8-cell battery and a 64GB SSD for it. One major disadvantage however, is the fan and power usage: Even ad idle, light websurfing it is so hot that the fan has to spin so fast that it is annoying to listen to.

The switch from x61s to x60s took around 60 seconds: unscrew the screw holding the harddrive into place. Swap the drive. Do the same with the battery. And power on. Ubuntu 11.10 booted just fine. No errors whatsoever. But then again. I had forseen this might happen, so I was already running an 32-bit version of ubuntu 11.10. Had I run an x86_64 version I wouldn’t have been that lucky as the cpu in my x60s is on 32-bit.

So to sum up: The x60s is a  teeny weeny bit slower than the x60s, but has marginally better power-envelope, but most importantly is quite a bit more silent to use! I will recommend the x60s over the x61s for the noise alone.

Using the E3000 as a caching DNS server (on dd-wrt)

Saturday, December 31st, 2011

Due to popular demand I’ll post this on how to use the E3000 as a generic DNS server. I’t will be very brief, you have to fill in the blanks yourself.

First you have to get the support tools in place for this. dd-wrt is build for smallish setups as well, so some of the tools are quite limited to say the least. There are basically two routes:

  • Fiddle with the internal flash so that you can use the built-in ipkg on a jffs2 mounted flashdrive
  • Mount an USB stick, download ipkg-opt and work from there

I choose the latter. Primarily due to the fact that, that option gave me 4GB of space in /opt. It is actually quite simple

dd-wrt usb flash

dd-wrt usb flash

You then install ipkg-opt and companion tools (uclib-opt). You can use this wiki post on the dd-wrt wiki.

After that you can install all your extensions through ipkg-opt (or download them by hand). For my DNS resolver needs I choose the wonderful dnsmasq software. It acts as DNS/DHCP and TFTP software. From my router

root@dd-wrt:/opt/sbin# ipkg-opt list | grep -i dnsmasq
dnsmasq – 2.58-1 – DNS and DHCP server

The observant reader noticed that dd-wrt calls /opt/etc/config/startup in the screenshot abov (after having mounted /opt). This script is the startup script of all your /opt related stuff. I went with something like

#!/bin/sh

unset LD_LIBRARY_PATH
unset LD_PRELOAD

[ -e /opt/etc/profile ] && mount -o bind /opt/etc/profile /etc/profile

grep nobody /etc/passwd > /dev/null
if [ $? -ne 0 ]; then
echo “nobody:*:65534:65534:nobody:/var:/bin/false” >> /etc/passwd
fi

if [ -d /opt/etc/init.d ]; then
for f in /opt/etc/init.d/S* ; do
[ -x $f ] && $f start
done
fi

and have a

root@dd-wrt:/opt/sbin# ls -al /opt/etc/init.d/S56dnsmasq
-rwxr-xr-x    1 root     root          215 Jan  1  1970 /opt/etc/init.d/S56dnsmasq
root@dd-wrt:/opt/sbin# cat /opt/etc/init.d/S56dnsmasq
#!/bin/sh

unset LD_LIBRARY_PATH
unset LD_PRELOAD

if [ -f /var/run/dnsmasq.pid ] ; then
kill `cat /var/run/dnsmasq.pid`
fi

rm -f /var/run/dnsmasq.pid

sleep 2
/opt/sbin/dnsmasq –conf-file=/opt/etc/dnsmasq.conf

Finally we are getting there. Before showing the dnsmasq.conf file, I will show a screenshot of the setup on the dd-wrt gui in order to use dnsmasq as DNS and DHCP server:

dnsmasq setup in dd-wrt

dnsmasq setup in dd-wrt

Notice how the built-in dhcp server is disabled and how I have choosen to use dnsmasq. Now onto the configuration of dnsmasq.conf:

root@dd-wrt:/opt/sbin# grep -v “^#”  /opt/etc/dnsmasq.conf  | grep -v “^$”
tftp-no-blocksize
log-dhcp
interface=br0
resolv-file=/tmp/resolv.conf
domain=zensonic.dk
dhcp-leasefile=/tmp/dnsmasq.leases
dhcp-lease-max=50
dhcp-authoritative
dhcp-range=lan,192.168.1.100,192.168.1.143,255.255.255.0,1440m
stop-dns-rebind
dhcp-host=00:22:FB:BB:C8:E0,kitchen,192.168.1.116,infinite
dhcp-host=00:18:71:E3:22:4d,dl145-1,192.168.1.117,infinite
dhcp-host=00:14:38:bf:a9:16,dl380g4i,192.168.1.119,infinite
dhcp-host=00:14:38:bf:a9:19,dl380g4,192.168.1.121,infinite
enable-tftp
tftp-root=/opt/var/tftproot
dhcp-boot=pxelinux.0

You will immediately notice a couple of things. Notice how I have the range setup for dhcp leases. Notice also how I have static leases. And finally notice how I have tftp enabled. Another blogpost on tftp another time (quite nifty for setting up servers on my vmware backend in minutes using kickstart, yast2 and solaris jumpstart).

You might think: where are the zone records? The answer can be found from the man page for dnsmasq

Dnsmasq accepts DNS queries and either answers them from a small, local, cache or forwards them to a real, recursive, DNS server. It loads the contents of /etc/hosts so that local hostnames which do not appear in the global DNS can be resolved and also answers DNS queries for DHCP configured hosts.

So I simply add my infrastructure to /etc/hosts and run /opt/etc/init.d/S56dnsmasq.

I only had the need for running DNS locally, so my choice was dnsmasq. You can also install a full fledged bind if you have that desire

root@dd-wrt:/opt/sbin# ipkg-opt list bind
bind – 9.6.1.3-4 – Bind provides a full name server package, including zone masters, slaves, zone transfers, security multiple views.  This is THE

Brute force password cracking of ATA security locked harddrives

Monday, November 28th, 2011

Recently I found a x41 thinkpad in good condition, but with a locked 1.8″ drive. I google a bit and found that there is almost no chance of buying a new 1.8″ drive. So now what? I could mod the machine with SSD like this guy has done. Or I could try to crack the password of the 1.8″ drive. I’ll try the latter before I give in an mod the machine.

So how do I crack the password of a 1.8″ drive. You can buy all kinds of stuff of the internet. And lo and behold. Someone claims to be able to give you the master password if you give them some stash.

Instead of handing out my money to strangers on the internet, I read the ATA specs and tried to do it like this:

  • Realize that the drive is in maximum security mode. So you have to cycle the drive power for every X failed tries with the user password. Go for a security erase of the drive with the master password instead. Might be a harder password, but atleast I can try unlimited amount of times without the drive demanding a power cycle.

So I ended up like this

  • Download ubuntu 10.04. Create bootable usb pen.
  • pull out the drive of the x41
  • Boot the x41 of the usb pen
  • put the drive back into the x41 while ubuntu boots.
  • issue ‘echo “- – -”  >  /sys/class/scsi_host/host0/scan
  • download john the ripper from openwall together with a dictionary.
  • compile john the ripper.
  • Figure out details of the drive with hdparm -I /dev/sda
  • Execute this command: ./john –wordlist=./all –stdout | while read pass ; do hdparm –security-erase “$pass”  /dev/sda ; if [ $? -ne 5 ]; then exit 1; fi ; done > /dev/null 2>&1

Presently I brute force attack the drive with 1000 words pr. second. Might not yield anything. But atleast I tried ;-)


Using an Linksys E3000 AP as a general linux server

Wednesday, September 21st, 2011

Recently I said farwell and thanks for all the fish to my old Linksys WRT54G router(s). They served me well for many years, but end the end they lacked IEEE 802.11n and 1000BASE-T. After looking around I decided to buy the Linksys E3000 AP. It stayed within my budget, had almost all features I desired and could also run community based firmware.

I tried to run with the built in firmware. And I did. For a month or so. And then I gave in and installed dd-wrt on the thing. The built-in firmware works and is stable. But boy it lacks features!

Getting dd-wrt onto my AP was easy due to this tutorial. After I got dd-wrt onto the AP I had myself a full blown linux distribution. Comparing the E3000 with its 240MHz MIPS cpu and 64MB memory to my first PC with its 66MHz intel 80486 with 4MB memory made me smile ;-)

root@dd-wrt:~# cat /proc/cpuinfo
system type             : Broadcom BCM4716 chip rev 1
processor               : 0
cpu model               : MIPS 74K V4.0
BogoMIPS                : 239.20
wait instruction        : no
microsecond timers      : yes
tlb_entries             : 64
extra interrupt vector  : no
hardware watchpoint     : yes
ASEs implemented        : mips16 dsp
shadow register sets    : 1
VCED exceptions         : not available
VCEI exceptions         : not available

Having such a small nifty general purpose platform at my disposal ofcourse made me think what I should use it for (besides moving bytes around in my house). I found these things I want to and/or have implemented on it:

  • Local DNS server. I have many many projects brewing all the time and have vast amount of hardware. I utilize a DNS server to keep track of my ip assignments, either static or through DHCP. Running a DNS server on the router is a must.
  • PXEBOOT server.
  • TFTP server.
  • NFS server
  • DansGuardian filter

Reducing RHEL5 idle cpu usage under esx

Tuesday, July 5th, 2011

Today I installed two RHEL5 servers on my ESXi rig. To my surprise they idled at around 300MHz?! My Debian 6.0 based server and my Win2k3 based server idles at around 50MHz, sowhat was the problem?!

Looking inside the vm showed that the vm was idle. So what was going on here? I tried to use vmxnet3 instead of E1000. I tried to stop a lot of services. To no avail.

It turns out that it is the frequency of the context switches. Edit /etc/grub.conf and add divider=10 to the ‘kernel’ line and reboot the beast. Usage will drop to sane levels!

Installing ESXi 4.1 on an AMD Brazos platform

Saturday, April 23rd, 2011

One of my projects this easter was to give my home server an overhaul. The harddrives was running very low on kapacity and the Ubuntu server installation was beginning to be a nightmare to maintain. I choose to upgrade the hardware as well and then thrown in ESXi into the equation as well.

The hardware

The hardware centers around an  ASUS E35M1-M mainboard with an AMD Zarcate APU and a AMD Hudson M1 FCH. The APU has two cores, a TDP of mere 18W and has the AMD-V extensions.

I bought 2 x 4GB of memory for the setup, which is maximum for the board.  Lastly I bought a couple of Samsung F4EG HD204ui drives (low power, low cost, high capacity, resonable performance)

Planning it

Planning the installation revealed that

  • ESXi 4.1 does not support the board; the onboard NIC is not supported.
  • The Samsung drives has a serious firmware bug.
  • The E35M1-1 doesn’t have raid functionality, if you care about (some of) your data.
  • The E35M1-1 board has an EATX 24pin power connector and my oldish antec cabinet/psu only has an ATX 20pin.

All items can either be fixed or worked around, not to worry.

Getting the hardware running.

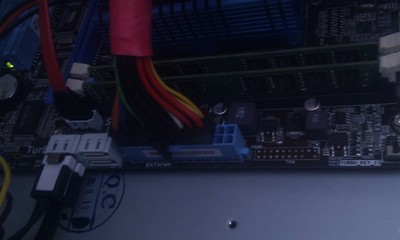
I put the hardware together in my oldish Antec cabinet. I then used a standard $10 multimeter to verify that the 4 extra pins on the EATX connector on the mainboard (compared to a normal 20 pin ATX connector),  was in fact hardwired/bridged to other pins on the mainboard. This bascially means, that a 20 pin ATX PSU will suffice for this board.

Hardware assembled. Using an normal ATX 20 pins PSU

After that, I obtained the firmware fix for the Samsung drives. It turned out, that I did not need it as drives manufactured later than December 2010 already contains the fix according to this post.

Installing ESXi 4.1 on the E35M1-M

You can download ESXi 4.1 for free. I did that. I burned the .iso file and booted from the CD. It booted the hypervisor, but complained/failed when I pressed F11 for installation. As guessed, it is due to the fact that the NIC, an RealTek 8111E is not supported.

The fix is to include the realtek 8111E driver in the iso file, in two places: One place, used to include support in the installer. An one inside the ddimage, that the installer deploys onto the hardware. It is fairly simple if you know your way around linux. Instructions on how to build ESXi modules is on the net. For the lazy, you can pretty much get it served to you: an oem.tgz (local copy here) and a script called mkesxiaio (local copy here) that combines the oem.tgz and the ESXi installation iso.

Download iso and oem.tgz and script. Run script and burn resulting iso file. Boot that iso and install ESXi 4.1 onto the system. For me it worked flawlessly.

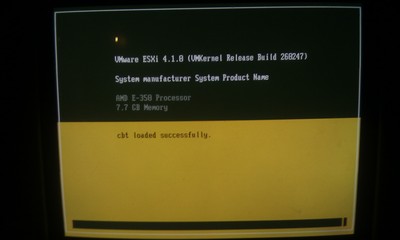
Booting the ESXi 4.1 hypervisor on the ASUS E35M1-M mainboard

The Software side

After that I installed the ESX license key, provisioned an vm, installed debian 6.0 and migrated all my files to the new server.

In the past I used to have a raid setup. The Hudson H1 FCH does not have raid support and neither does ESXi, except on selected raid controllers. Now what?

The trick is to do it in software on the VM side. You provision two VM disks, one from each datastore, and combine them into a mirror/raid device inside the vm. You basically have two options:

  1. md driver
  2. lvm mirror

If you care about performance and the integrity of your data, you should go for the md driver as it respects write barriers.  for my setup I thus ended up with 5 vmdisks

  • One for the OS
  • two combined into an md device for the crucial stuff and that in turn was used in a vg called vgsafe
  • two spanned across that datastores for the the non crucial stuff.  Those disks were just added to a vg called vgspan
edison% mount | egrep -i ‘(mapper|boot)’
/dev/mapper/edison-root on / type ext3 (rw,errors=remount-ro)
/dev/sda1 on /boot type ext2 (rw)
/dev/mapper/edison-tmp on /tmp type ext3 (rw)
/dev/mapper/edison-usr on /usr type ext3 (rw)
/dev/mapper/edison-var on /var type ext3 (rw)
/dev/mapper/vgsafe-lvhome on /home type ext4 (rw)
/dev/mapper/vgspan-software on /home/software type ext4 (rw)
/dev/mapper/vgspan-media on /home/media type xfs (rw)

Debugging dns problems

Thursday, February 17th, 2011

Recently I faced a DNS problem in a complex setup. I had a very locked down jumphost with one public network and two internal networks and a very nazi firewall controlling what packets went in an out.

On the inside I had a linux machine running BIND, also with a firewall and a locked down setup.

On yet another host on the inside, running HP-UX, DNS resolving worked just fine.

On the jumphost it didn’t work at all.

Took me hours to figure out what was going on. I went over the firewall again and again. On both the jumphost and the DNS server. I went over the bind configuration again and again. The network setup. To no avail. All i got was

Got recursion not available from 192.168.1.79, trying next server

In the end it turned out to be due to the fact that on the linux jump server, I had a two nameserver lines

domain zensonic.dk
search zensonic.dk
nameserver 192.168.1.79
nameserver 192.168.1.80

I hadn’t bothered to setup the DNS at 192.168.1.80 and thus my linux client would not function. As soon as I removed 192.168.1.80 from /etc/resolv.conf everything was as it should be. I hope that you, reading this, saves some hours worth of debugging. If you do, drop me a line/mail/beer :-)

Utilizing Seagate 7200.12 drives in an MSA20

Wednesday, February 2nd, 2011

About a year ago, I upgraded an MSA20 with non-HP drives. 1TB drives (7200.11 series) made by Seagate to be precise. Here one year later, the first drives start to fail. Looking for replacements we had a hard time finding the 7200.11 series drives. We then bought some 1TB 7200.12 drives.

And they work just fine……

Same model number, just different firmware as seen from the MSA20 (CC46 vs CC38):

physicaldrive 1:7
Box: 1
Bay: 7
Status: OK
Drive Type: Data Drive
Interface Type: SATA
Size: 1000.2 GB
Firmware Revision: CC46
Serial Number:             9VPB04V3
Model: Seagate ST31000528AS
SATA NCQ Capable: False

physicaldrive 1:8
Box: 1
Bay: 8
Status: OK
Drive Type: Data Drive
Interface Type: SATA
Size: 1000.2 GB
Firmware Revision: CC38
Serial Number:             9VP4D1F1
Model: Seagate ST31000528AS
SATA NCQ Capable: False